No products in the cart
Controller: “Learning” the 1st Generation Handheld Remote Transmitter
To ensure that another nearby transmitter will not accidentally activate the unit, the remote receiver can be configured to recognize a specific remote transmitter by changing the position of DIP switches on the transmitter prior to the LRN step.
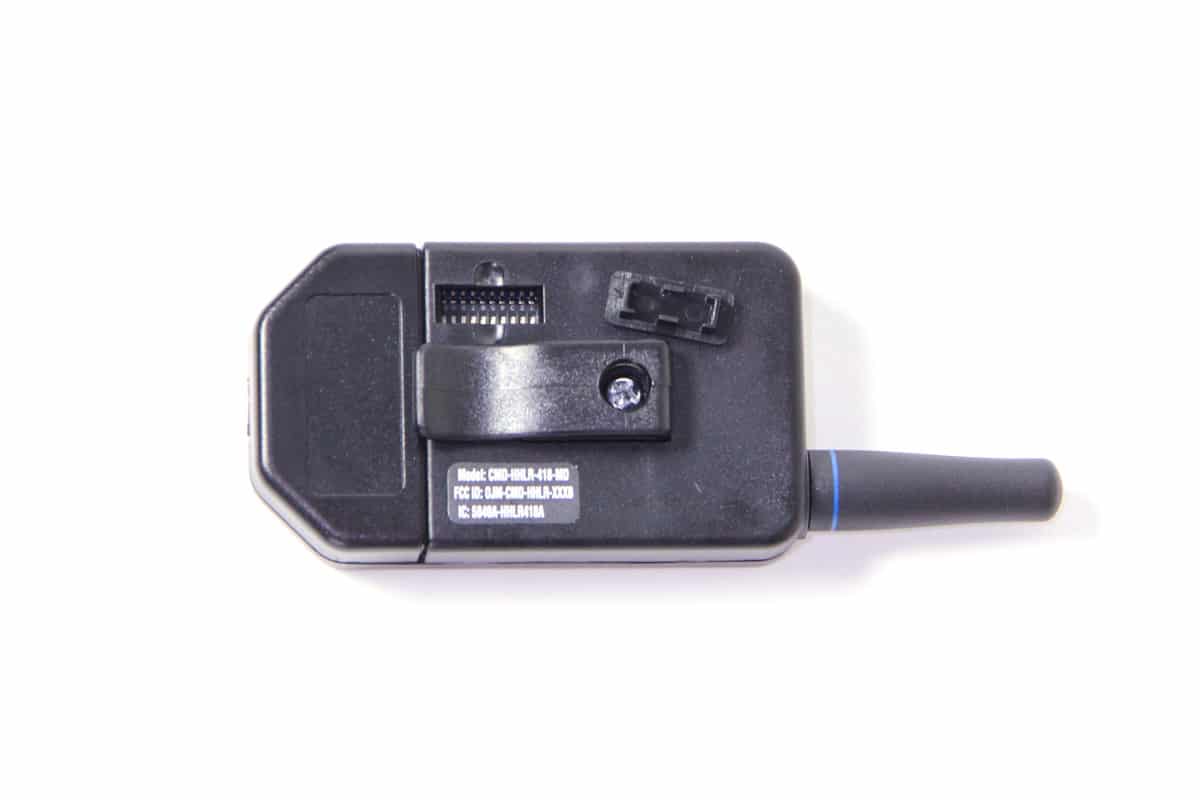
1. Open the transmitter and change the position of one or more DIP switches
A. The DIP switches are located on back of transmitter, on the side opposite the antenna, under a small plastic cover as shown.

B. Use the end of a pen to change the position of one or more of the switches, then replace cover.
2. Orient Remote Transmitter
- SET-UP Menu, LRN
- Press and hold Green ► button for 5 seconds until LRN ON and countdown starts
- Press and hold any button on the remote transmitter until DONE is displayed.
To troubleshoot a remote that is not working, please visit our Unit not responding to command from black remote transmitter article for guidance.

