No products in the cart

Replacing Nozzle Circuit Filter Element
WARNING!

AIR TRAPPED IN THE FILTER DUE TO IMPROPER INSTALLATION AND SYSTEM STARTUP COULD CAUSE VIOLENT RUPTURE OF THE FILTER HOUSING RESULTING IN SEVERE PERSONAL INJURY!
FOLLOW INSTRUCTIONS CAREFULLY.
- Before installing filter or replacing element, ensure nozzles are misting, there are no kinks or blocks in the nozzle circuit and the pump pressure does not exceed 250 psi.
- Fill filter housing completely with water.
- If necessary, adjust pump pressure to a maximum of 250 psi.
Gen 1.3 55 Gal Kit – (PN #29013)
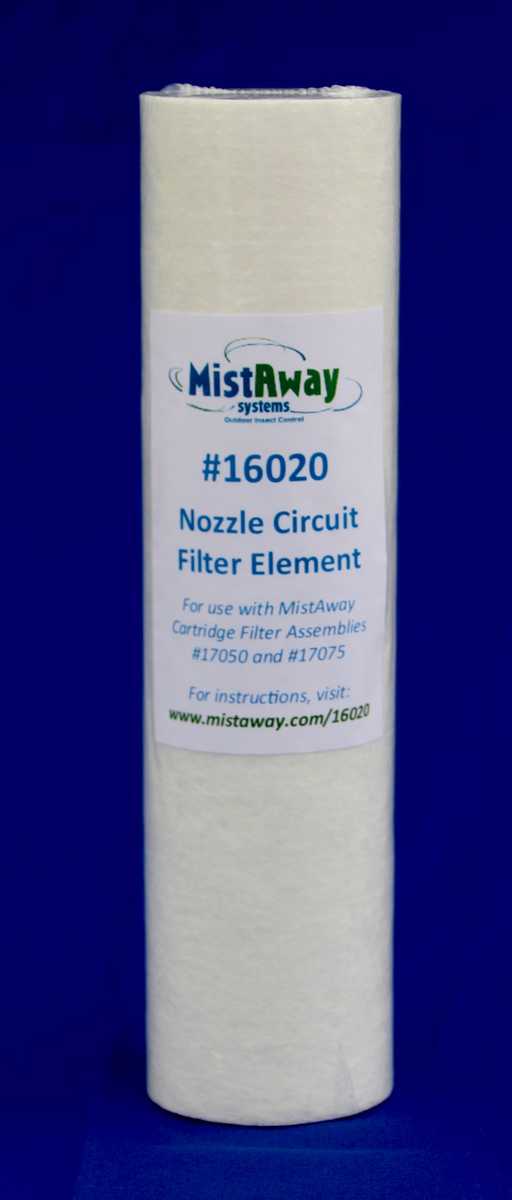
Check the element with each service visit and replace when the entire filter wall is dirty. Plan on replacing the element at least annually, and potentially more often for large nozzle circuits.

Time: 5 minutes
Tools: Flathead screwdriver to adjust pump pressure
Parts: Replacement nozzle circuit filter element (#16020 – 5 pack)
1. Before replacing element, ensure nozzles are misting, there are no kinks or blocks in the nozzle circuit and the PUMP PRESSURE DOES NOT EXCEED 250 PSI!
2. Unscrew housing from filter head and discard used filter element.
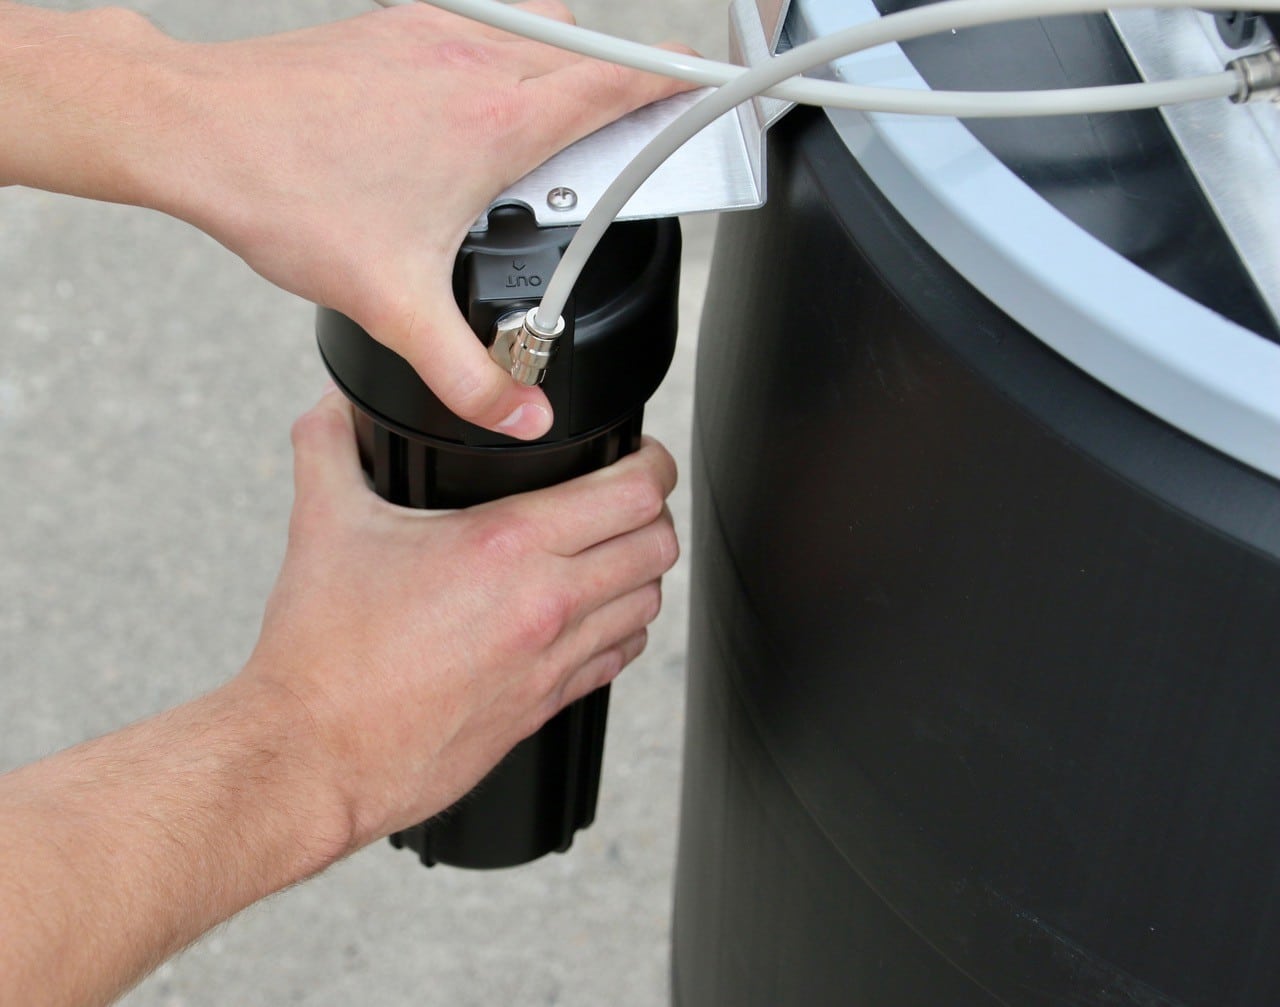
- Support filter head and bracket with one hand and turn housing clockwise with the other.
- If necessary, relieve pressure by removing tubing from port on unit.
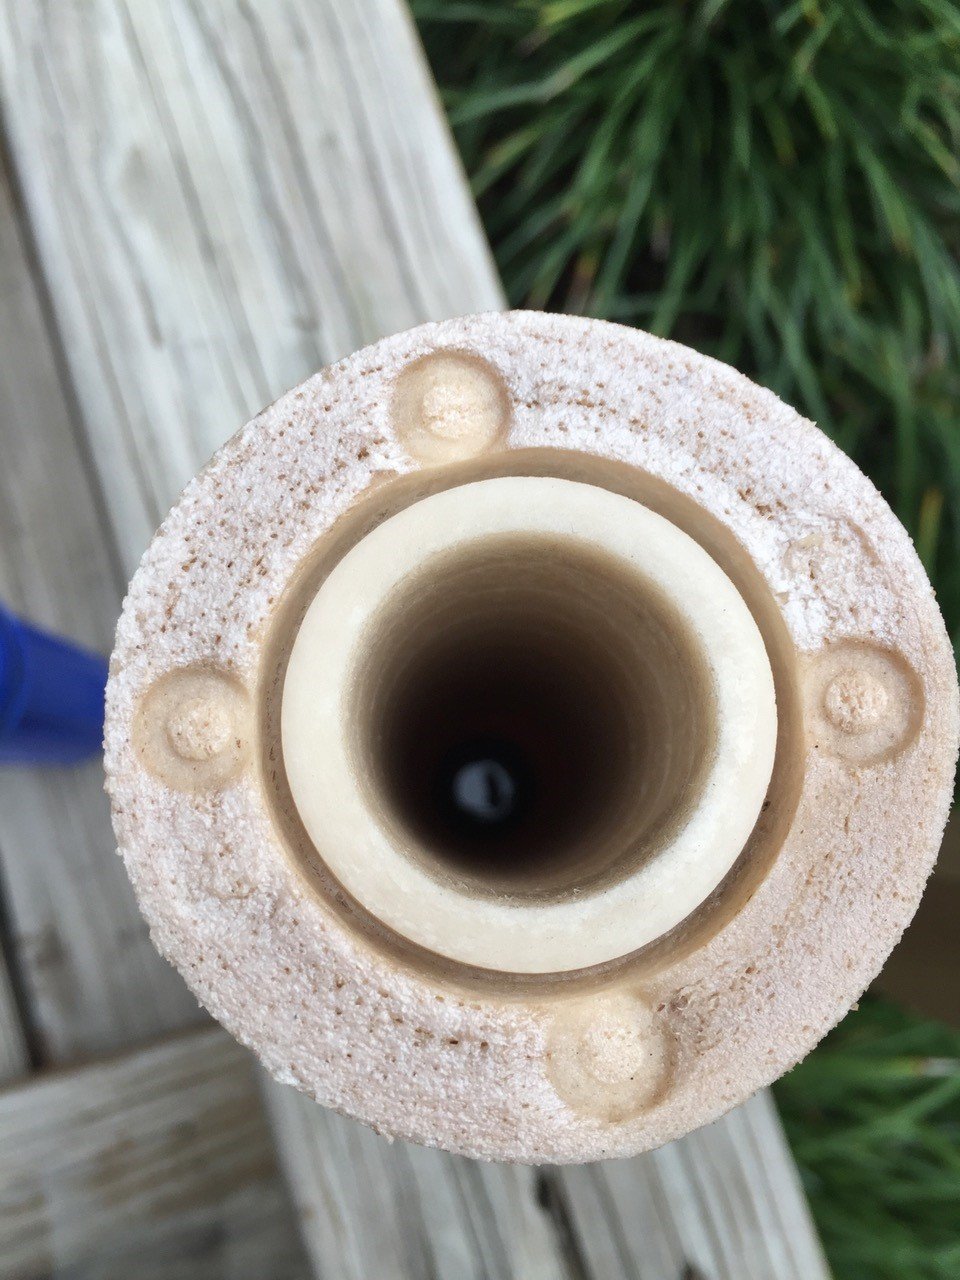
2. Ensure o-ring is in good condition and is seated in groove at top of housing.*
*If o-ring is swollen (and you don’t have a new o-ring), seat as much as you can in the groove before screwing the housing back onto the filter head.

3. Ensure filter housing is completely filled with fluid!
4. Position new filter element in the center of the housing and screw housing back onto filter head.
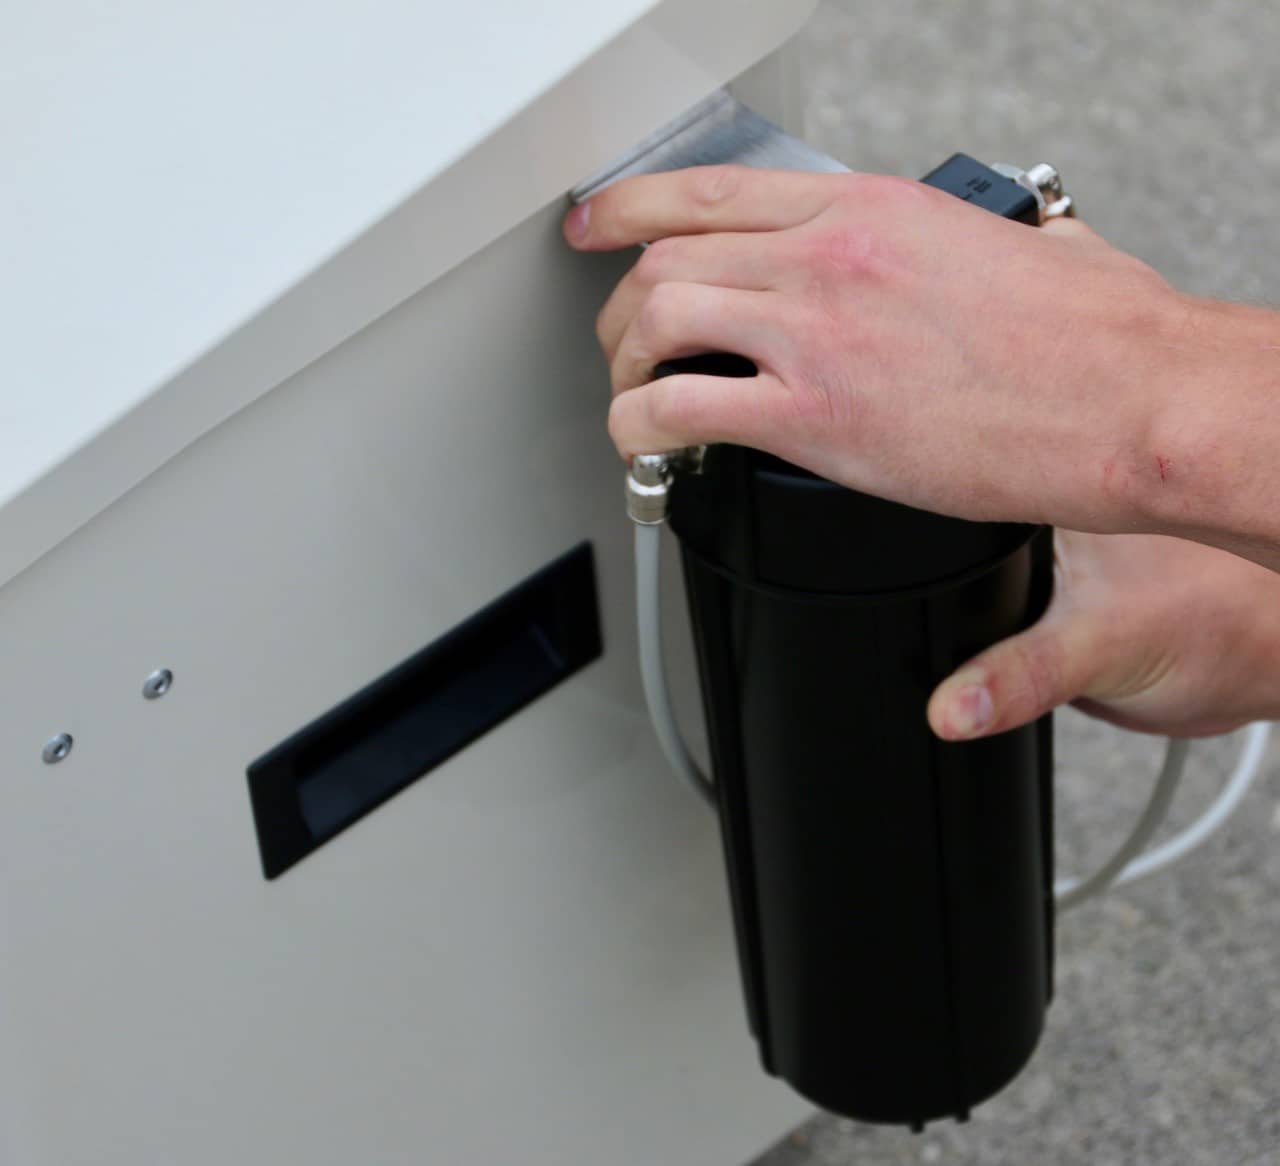
5. Execute a MIST and if necessary, adjust pump pressure to a MAXIMUM of 250 PSI!