No products in the cart

Gen 3: Access Components by Removing Sidewalls
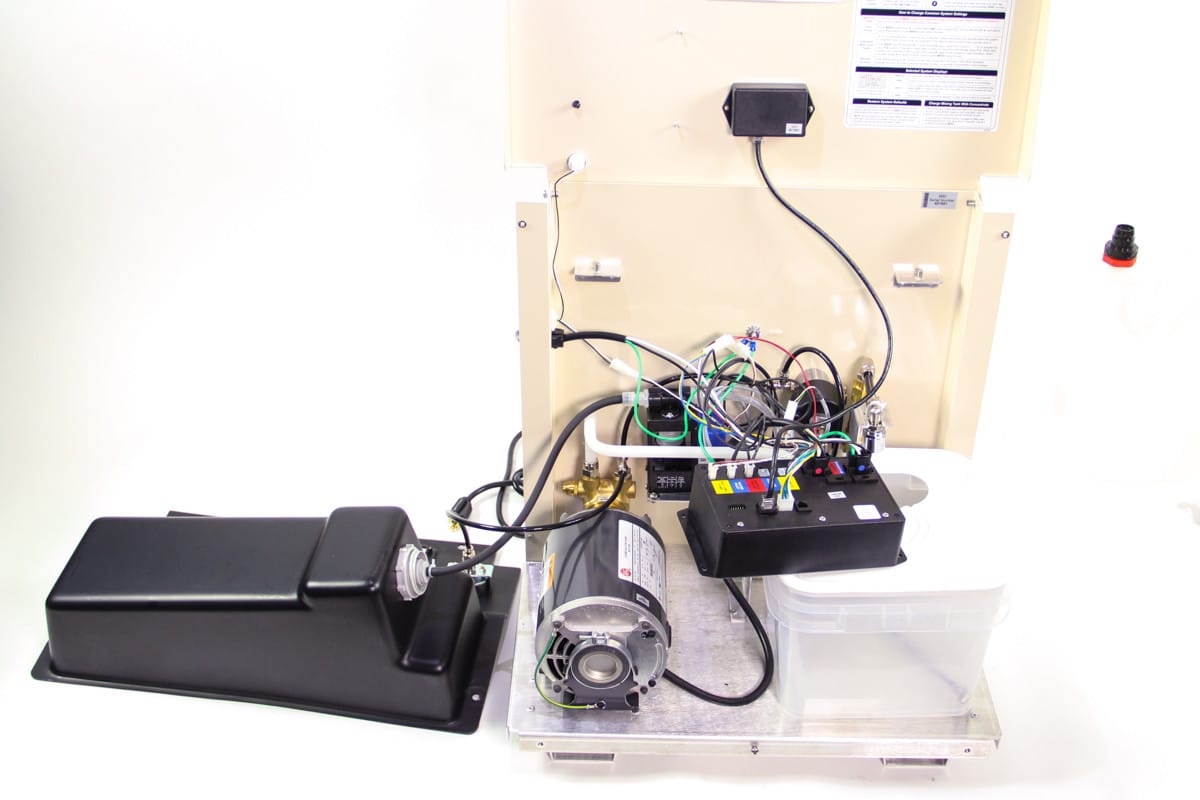
Some Gen 3 component repairs and replacement – inlet water valve, pump, motor – require that you remove the sidewalls to access those components.
Time: 5 minutes
Tools: Phillips head screwdriver
1. Remove sidewalls, then reposition controller and shroud.
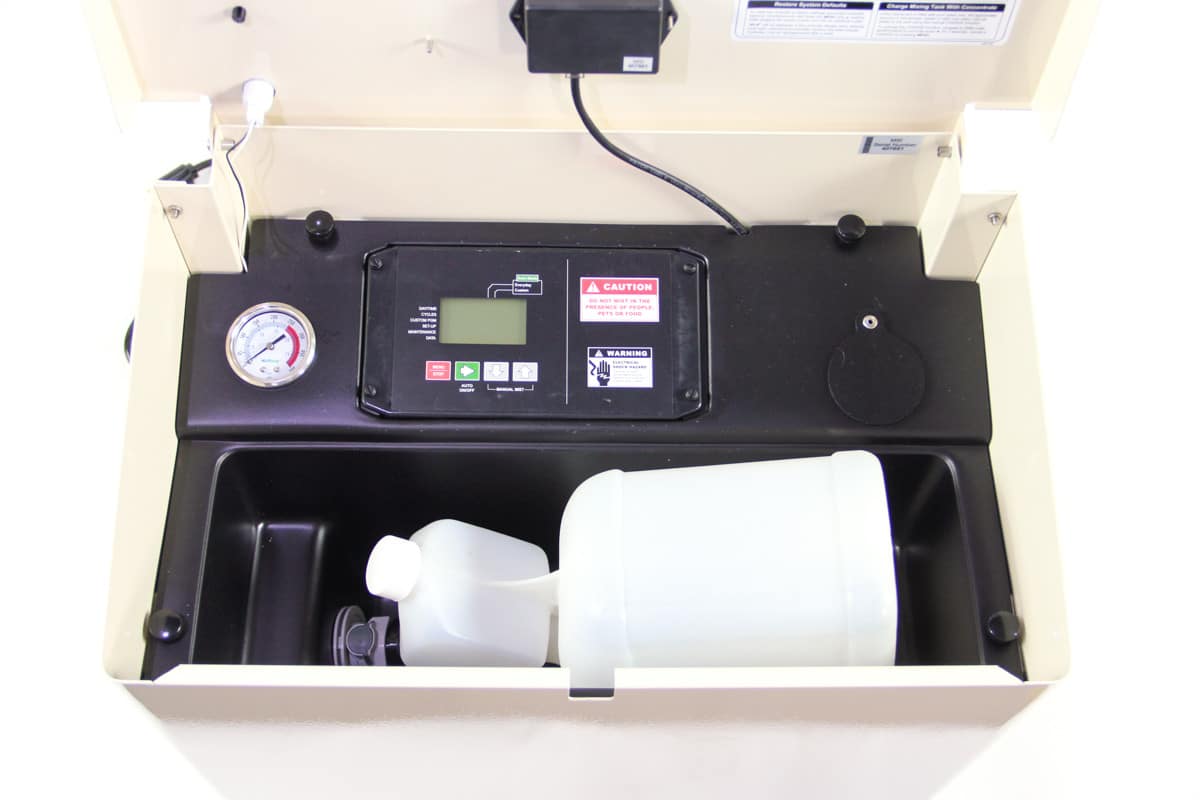
A. Release insecticide bottle from coupler and remove bottle.
B. Using phillips screwdriver, loosen – but do not remove – the middle screw on the front base of the unit
C. Remove the other 8 screws from the unit – 2 on the front, 1 on each sidewall, and 4 on the back. The sidewalls will rest on the post of the middle screw on the front.
D. Remove screws securing controller into shroud.
E. Leaving wiring harness connected, feed the controller through the well in the shroud and let it rest on the corner of the batch tank lid.
F. Remove the screws securing shroud.
G. Remove sidewalls by grabbing the handles, pulling them slightly outward, then lifting.
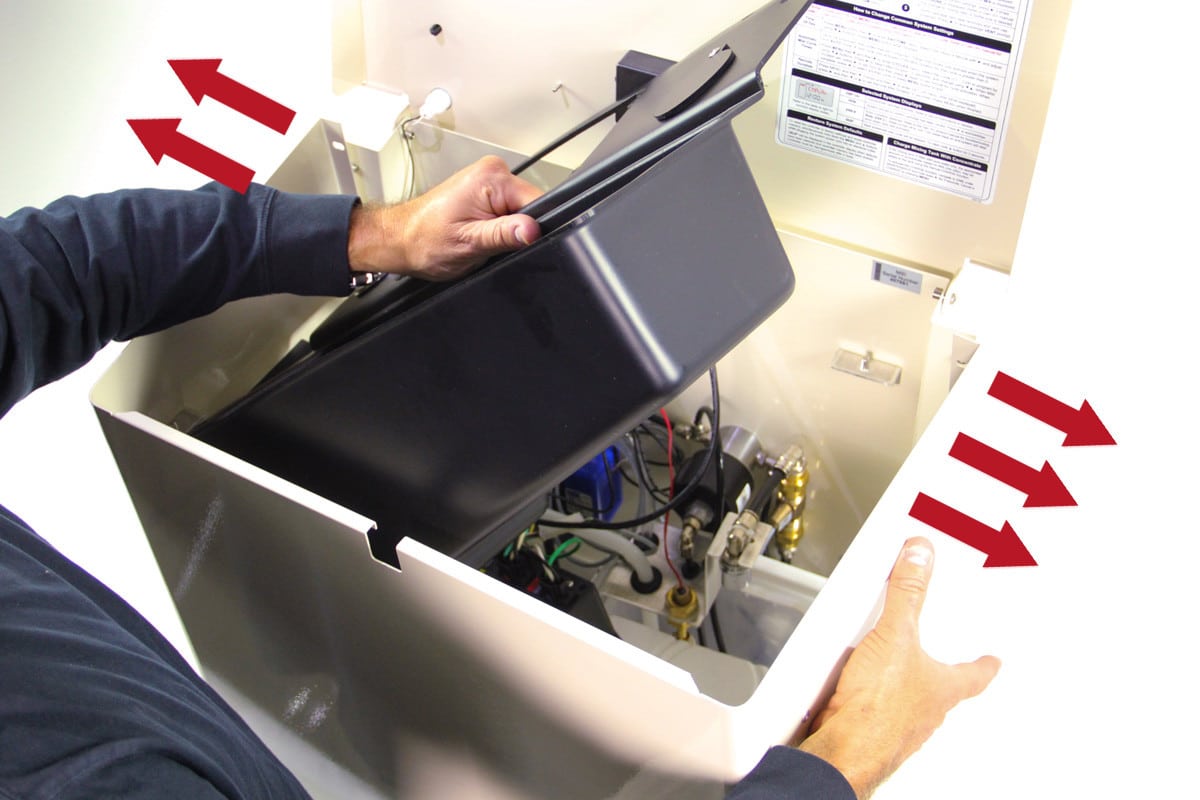
H. Lay the shroud to the left side of the unit.
4. After the repair or replacement is made and tested, reverse the process.
A. Rotate shroud to its original position, resting on posts on back wall
B. Feed controller back in place through well in shroud
C. To position sidewalls, grab the handles and pull slightly apart, then drop them around the unit and onto the post of the middle screw in the front base of the unit.
D. Replace the 8 screws on the sidewalls in this sequence. Do not tighten until they are all in place.
- 2 in front
- 2 in sidewalls
- 4 in back
E. Secure shroud and controller with screws.