No products in the cart

Gen 1.3: Replace Pressure Gauge
Time: 15 minutes
Tools:
- 15 mm wrench
- channel lock pliers or crescent wrench
- 5/16″ nut driver
- Teflon tape
Parts:
- Replacement Pressure Gauge Assembly – Includes Gauge and Fitting (SKU 21037)
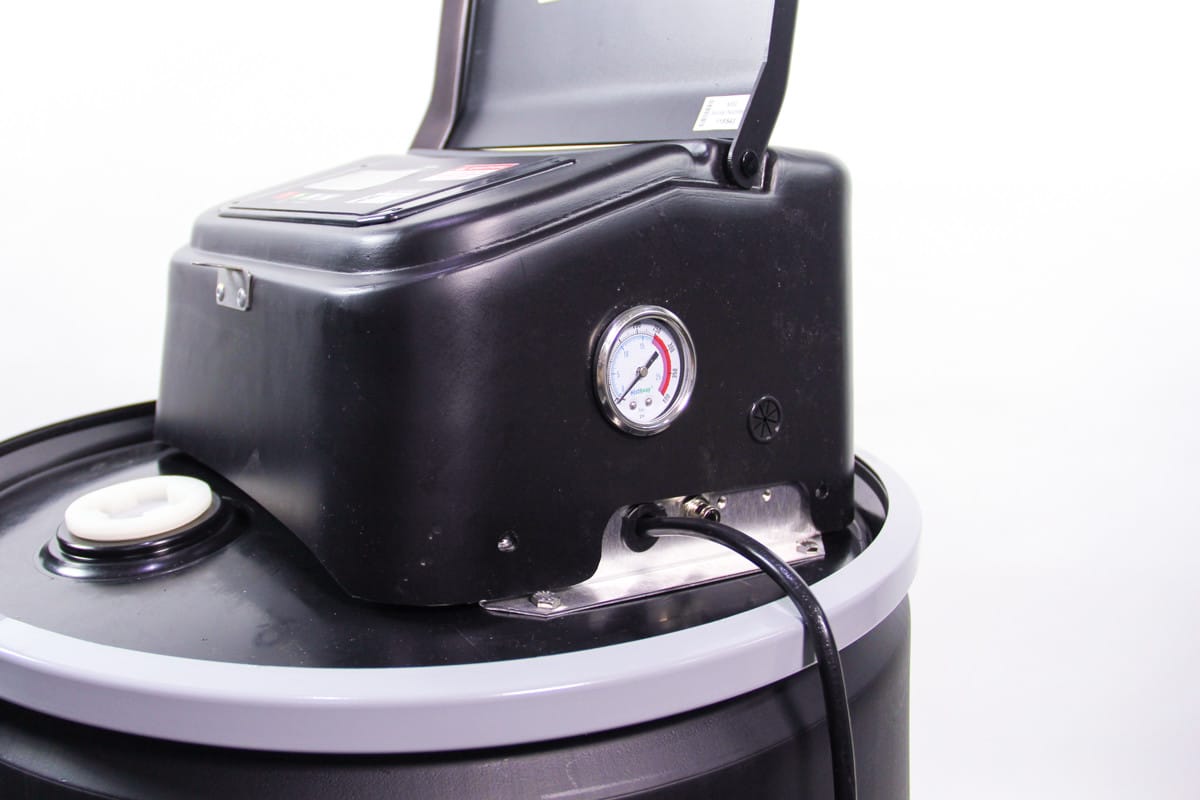
1. Reposition controller and plastic cover. See Gen 1.3: Access components by Repositioning Cover.
2. Remove existing pressure gauge.
A. Release 1/4″ tubing from the pressure gauge and remove the cover.
B. Use channel locks or crescent wrench and 15 mm wrench to remove straight female connector as shown.
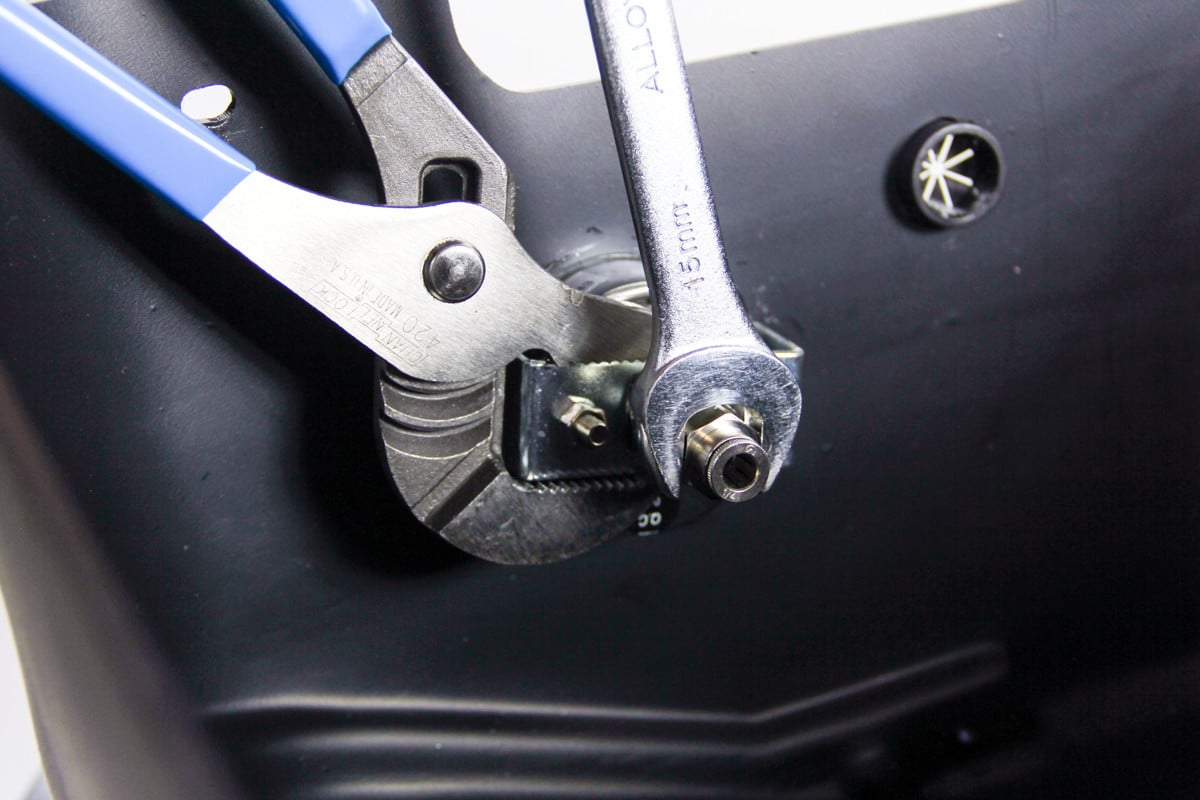
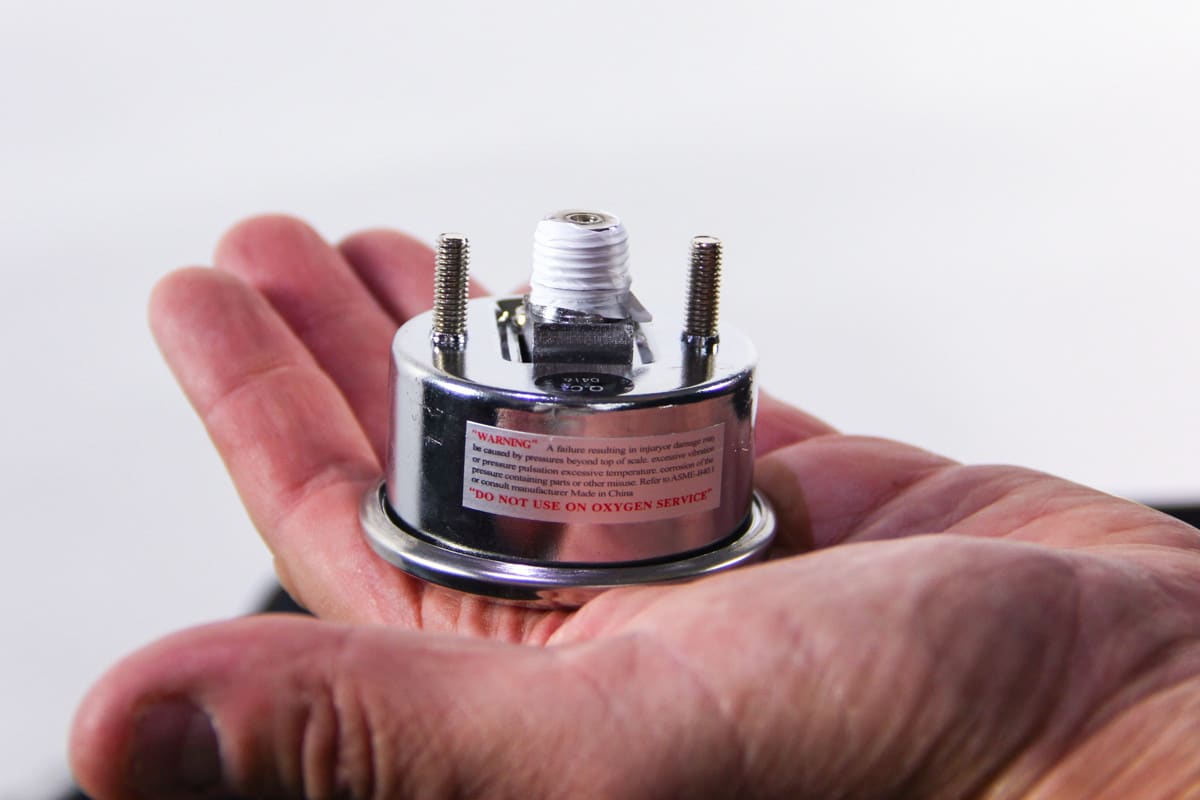
C. Use 5/16″ nut driver to remove nuts securing gauge to bracket, and remove the gauge from cover. Discard gauge.
3. Install replacement gauge
A. Wrap Teflon tape around threads on gauge.
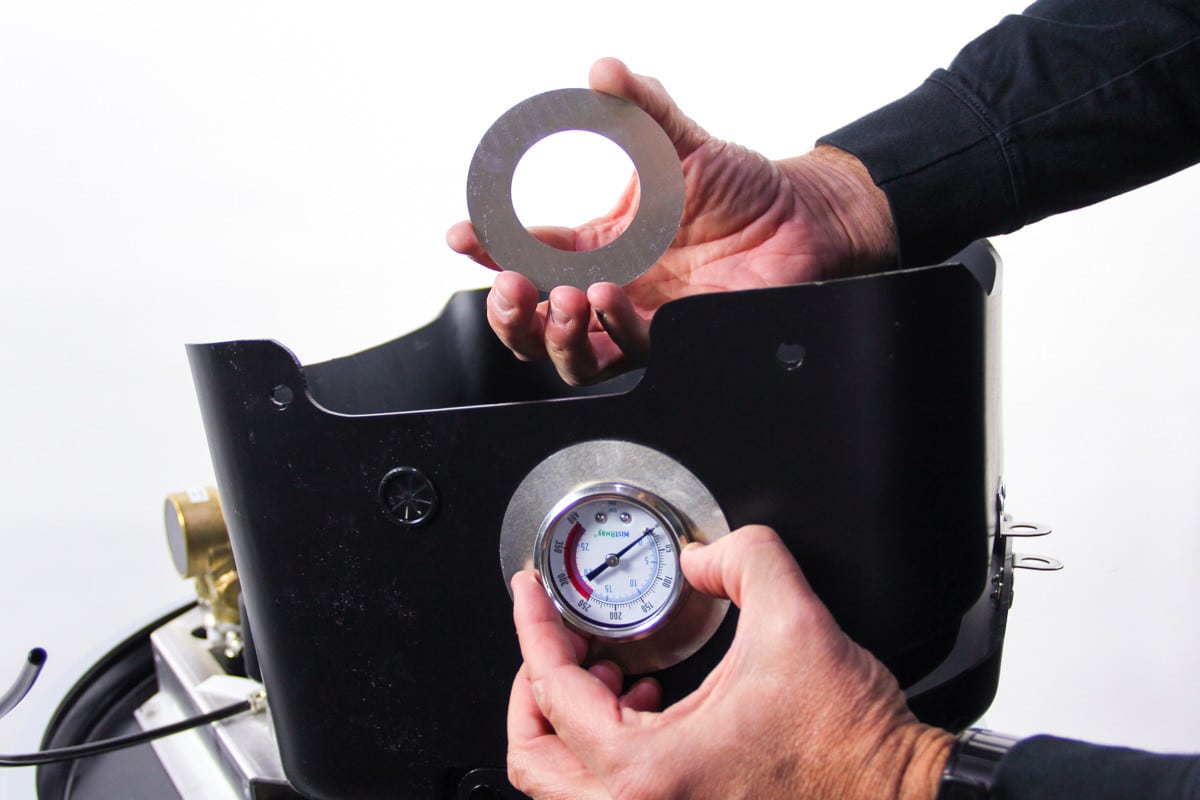
B. If the diameter of the failed gauge (and the hole it was mounted in) is the same size as the new gauge, proceed to step 3D. If not, you’ll need to use the adapter rings.
C. Slide one of the adapter rings over the gauge, then insert the gauge into the hole, so that the ring is between the gauge and the top side of the shroud. Slide the other adapter ring over the gauge, sandwiching the gauge and cover between the two rings.
D. Position the bracket on the back of the gauge and then tighten the straight female connector to the gauge.
E. Ensure the gauge is oriented correctly on the outside of the cover, then tighten the nuts securing the gauge to the shroud.
F. Reconnect 1/4″ nylon tubing to new gauge. Make sure it is secure in the fitting.
5. Return cover and controller to original position.