No products in the cart

Gen 3: Clean or Replace Inlet water valve

The inlet water valve is the silver cylinder mounted to the back wall in the lower right corner of the unit. The sidewalls must be removed to access it. The primary failure mode is rust or sediment that enters the valve body and prevents the plunger from closing completely. You can resolve this issue by disassembling the valve and rinsing the sediment away.
Time: 20 minutes
Tools:
- Phillips head screwdriver
- zip tie snip and zip tie
- channel lock pliers
Parts:
- Gen 3 – Inlet Water Valve Assembly (#21030) with assembly wrench
1. Remove sidewalls, controller and shroud. See Gen 3: Access Components by Removing Sidewalls.
2. Remove existing water inlet valve
A. Disconnect the lead from the controller marked “Water inlet.” Snip the zip tie that bundles the wiring harness.
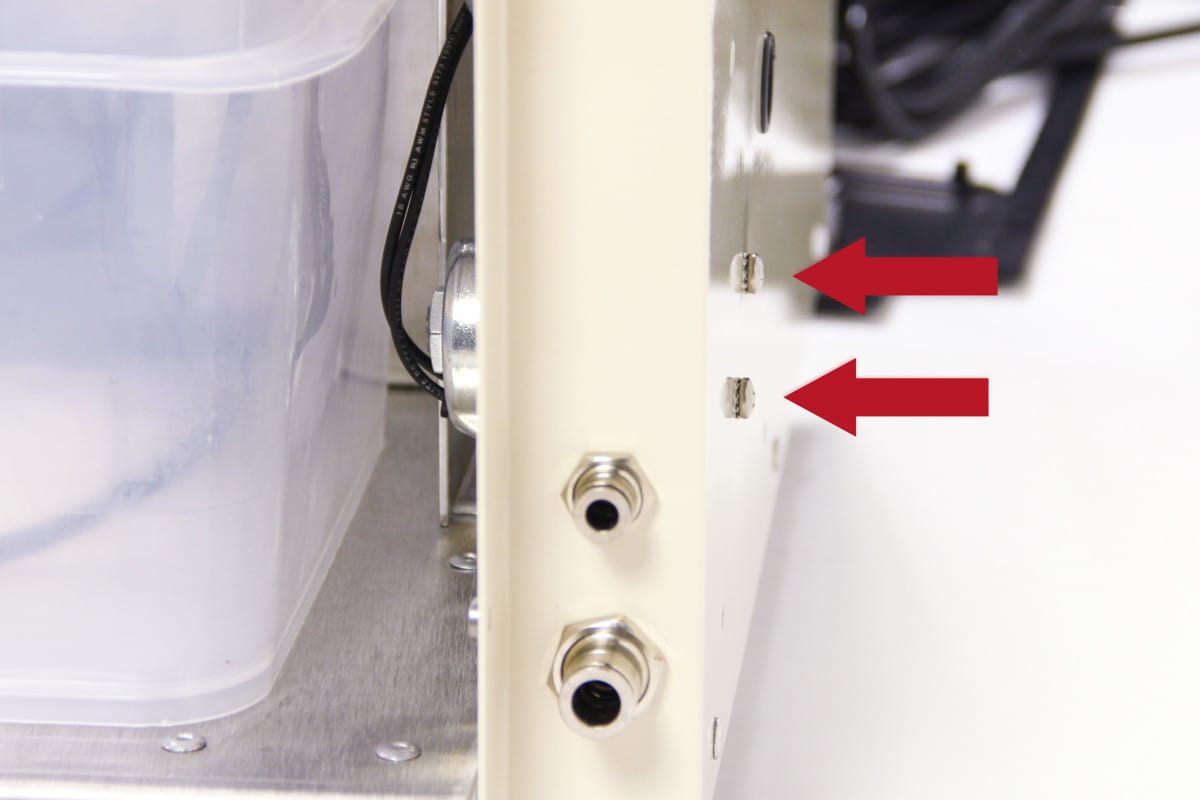
B. Using phillips screwdriver, remove the two screws securing the water inlet valve to the back wall of the unit.
C. Disconnect the two segments of 3/8″ nylon tubing that connect the inlet valve to the water line and to the flow meter, then remove the valve from the unit.
2. Disassemble and clean valve, then test
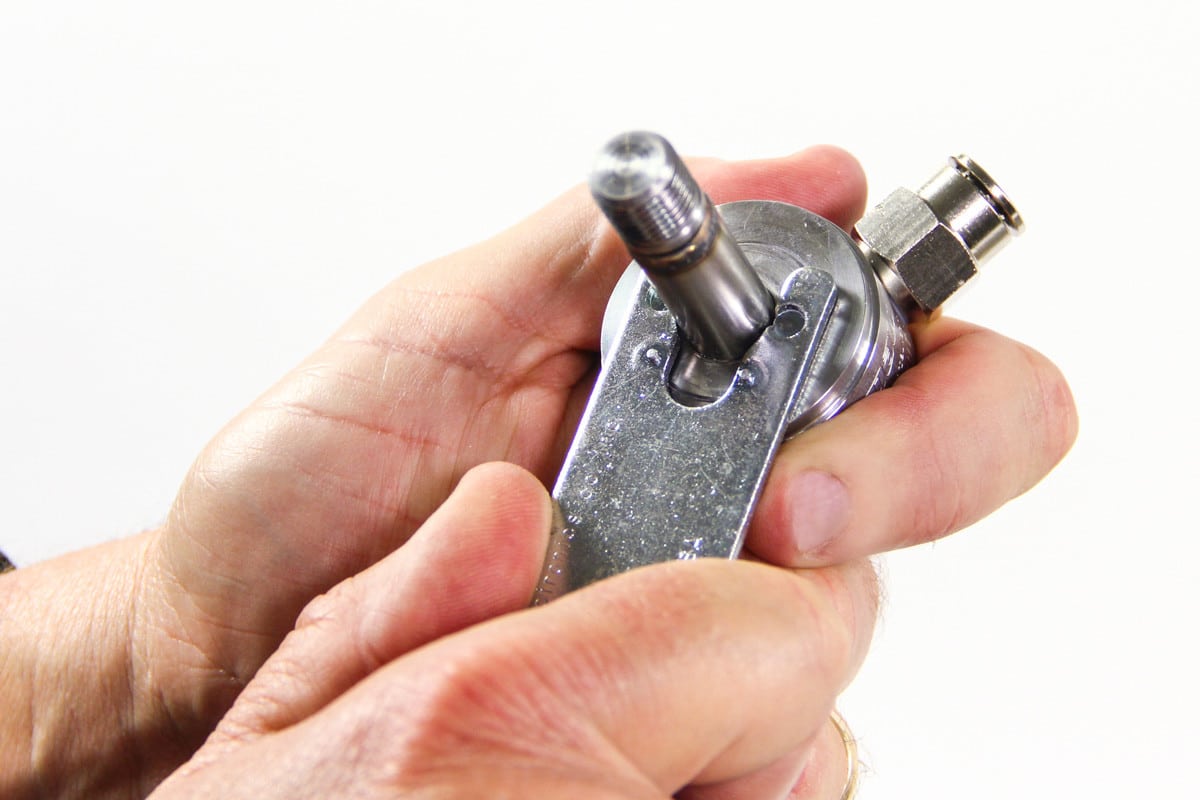
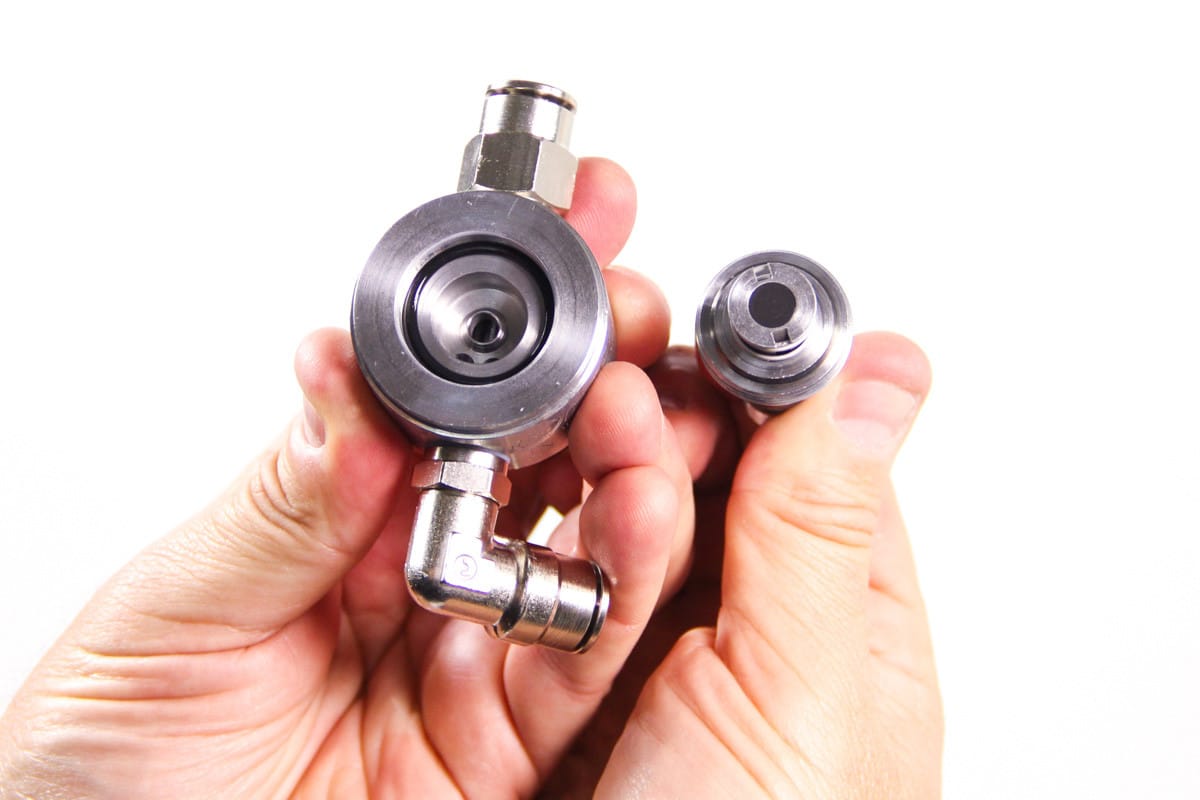
A. Using channel locks or assembly wrench to remove nut securing the valve case and remove the case.
B. Using channel locks just below the threads or assembly wrench to unscrew the plunger from the valve body as shown.
C. If you see sediment or rust in the valve body or stuck to the rubber plunger, rinse it away with water.
D. Reassemble the valve using channel locks.
E. Reconnect the 3/8″ tubing and reconnect the valve lead to the controller port marked “Water Inlet”
F. Run a remote or manual mist to ensure the valve is working properly.
G. If so, use Phillips screwdriver to mount valve to back wall with two screws and proceed to Step 4.
3. Replace with new valve and test
A. Disconnect failed valve from 3/8″ tubing. Disconnect lead from controller, and remove failed valve.
B. Connect the new valve to water inlet and flow meter tubing.
C. Ensure to install the inlet valve same as the old valve was installed, with the label up, flat down.
D. Using Phillips screwdriver, mount valve to back wall with two screws.
E. Connect lead to controller port marked “Water Inlet”.
F. Run a remote or manual mist to ensure the valve is working properly.
4. Replace shroud, controller and sidewalls.