No products in the cart

Gen 3: Replace Motor
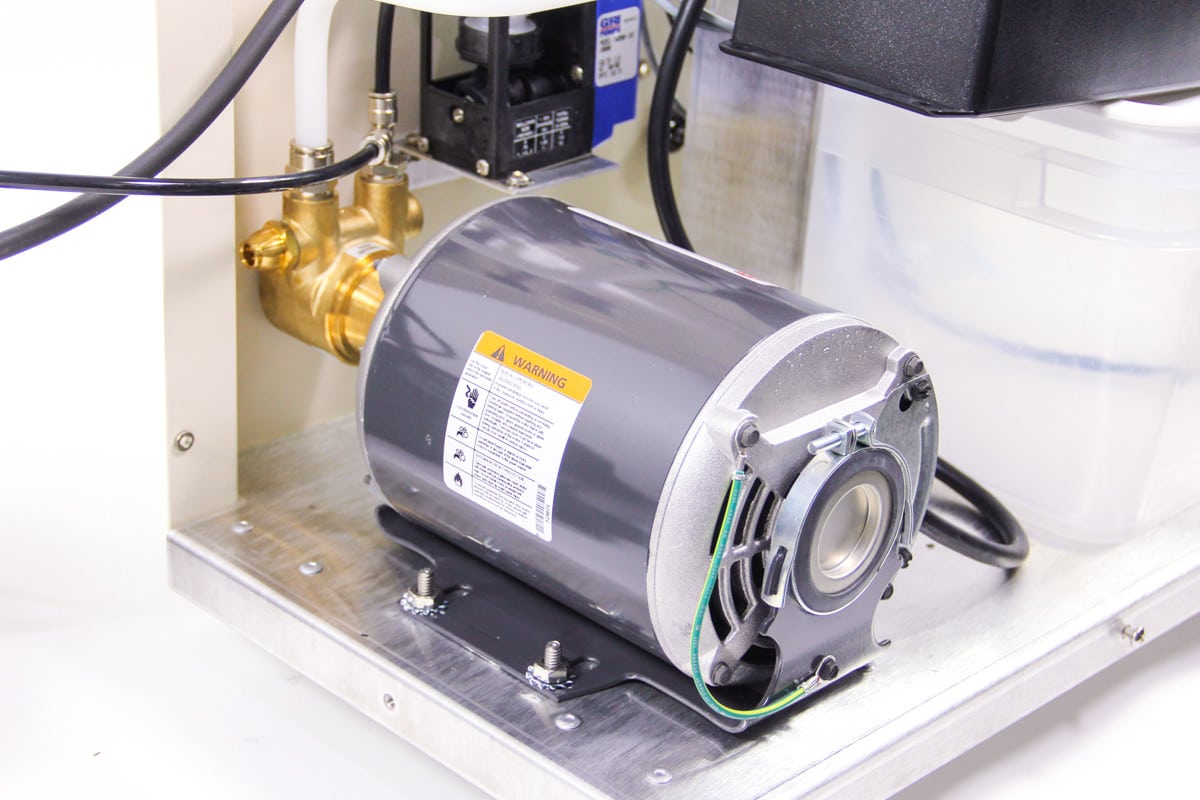
The motor is located in the lower left corner of the unit. The sidewalls must be removed to access it.
Time: 20 minutes
Tools:
- Phillips head screwdriver
- 1/2″ ratcheting wrench
- 1/4 nut driver
Parts:
- Gen 3/1.3 Motor – 1/2 HP (#10800)
1. Remove sidewalls, controller and shroud. See Gen 3: Access Components by Removing Sidewalls.
A. The pump and motor will be exposed in the back left corner of the unit.
2. Remove existing motor and disconnect the motor cable.
A. IMPORTANT!! Unplug the motor cable connector from the controller port marked “Motor.”
B. Using Phillips screwdriver, remove the screw in the clamp that connects the pump and motor and pull the pump off the motor.
C. Use the 1/2″ ratcheting wrench to remove the nuts that secure the motor to the floor of the unit. Save the nuts and lock washers and remove the motor from the unit.
D. On the end of the motor where the cable is connected, use the nut driver to remove the two black screws from the gray cover plate and remove the plate.
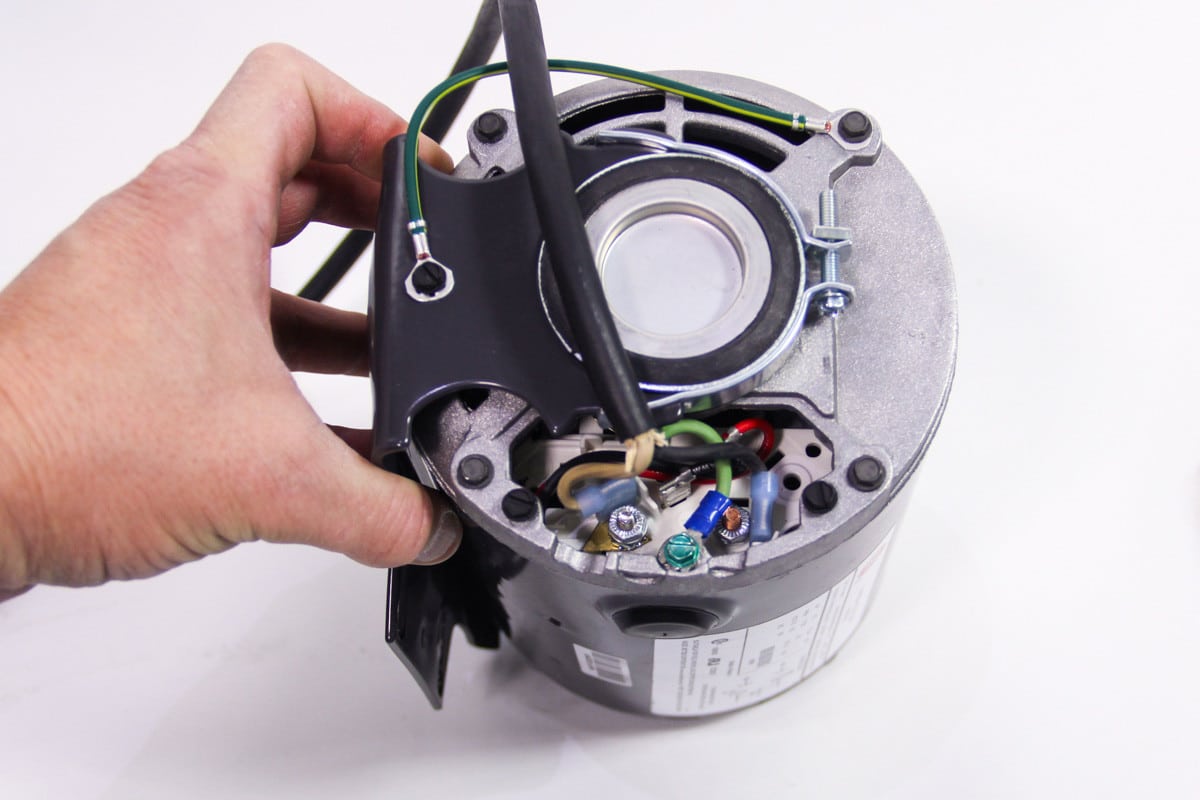
E. Loosen the green screw and disconnect the green lead. Disconnect the white and black leads from their connections. Discard the motor but keep the cable.
3. Connect motor cable to new motor and test.
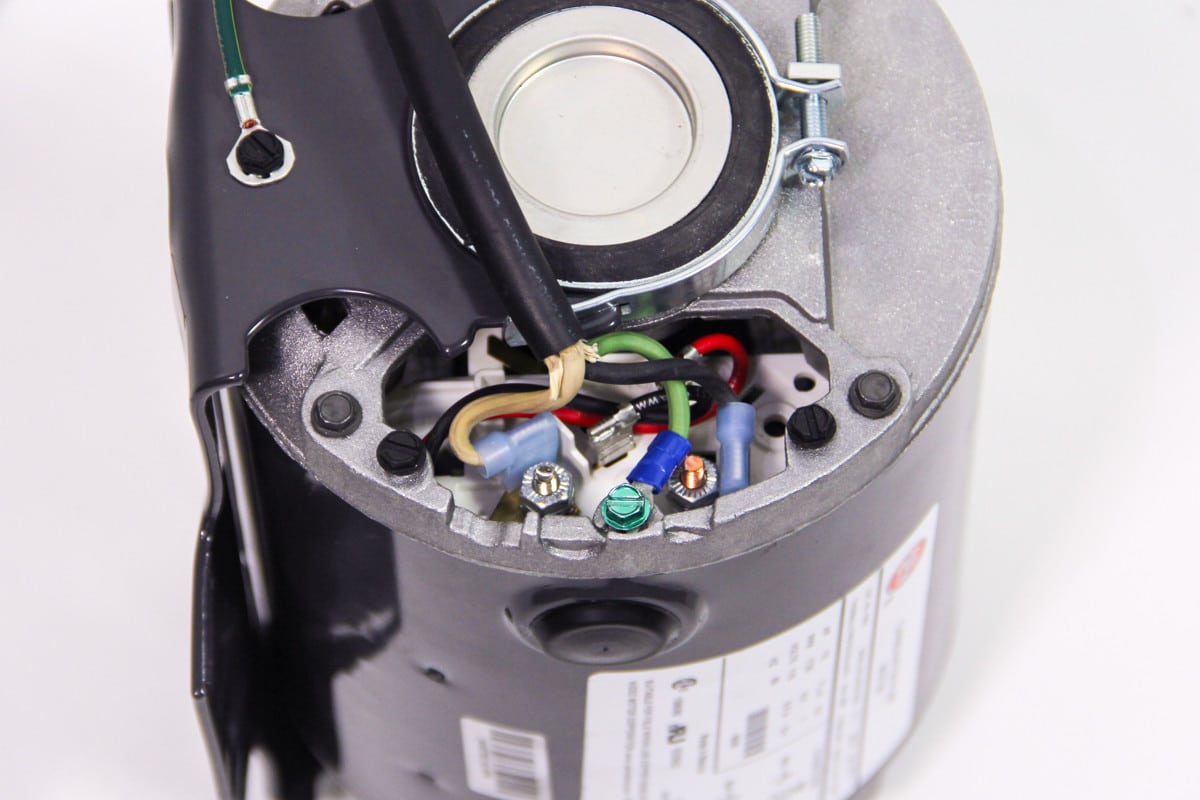
A. See photo. Remove the gray cover plate from the new motor. Connect the black lead to the terminal marked “1” and the white lead to the terminal marked “4”.
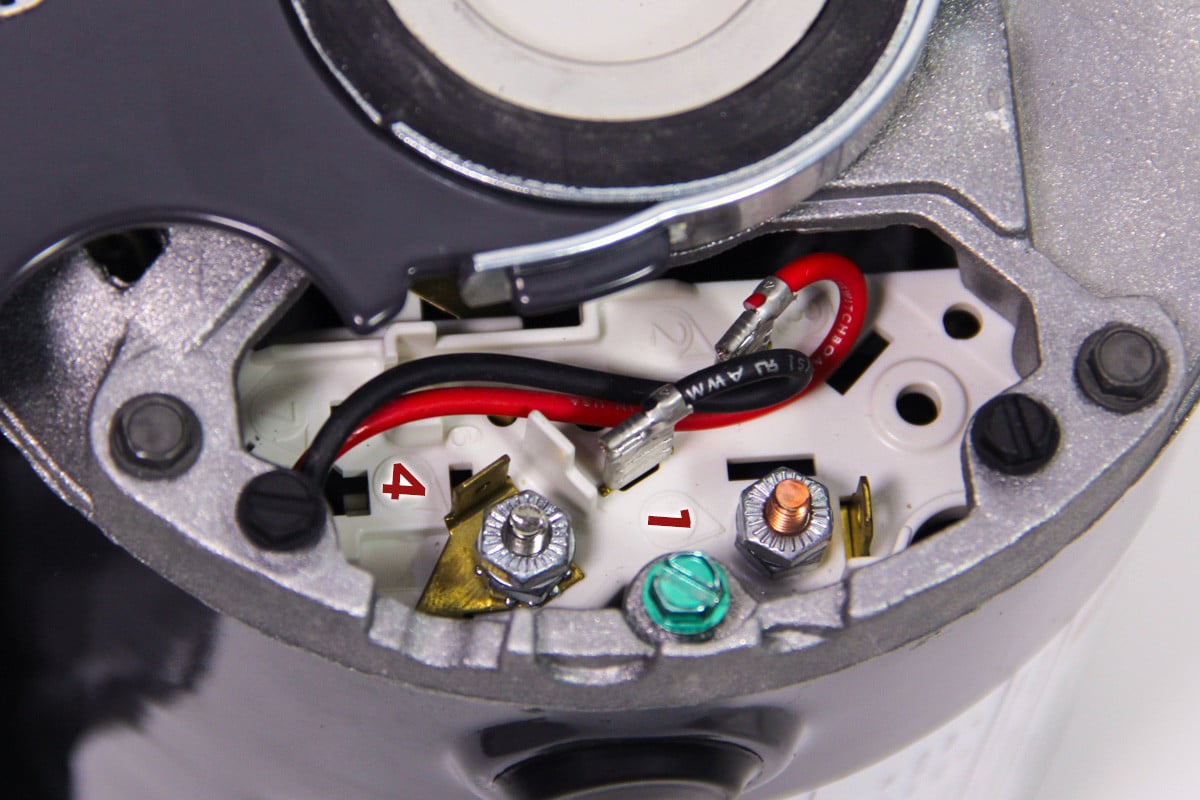
B. Use the 1/4″ nut driver to loosen the green screw. Slide the connector on the green lead onto the post and tighten the screw.
C. Connect the motor cable connector to the controller port marked “Motor.”
D. Holding the motor, run a Manual Mist to confirm that the motor spins when powered.
4. Secure motor to unit floor, connect pump to motor and test.
A. IMPORTANT!! Unplug the motor cable connector from the controller port marked “Motor.”
B. Orient the motor so that the cable end is nearest the front of the unit. Place the motor over the 4 studs in the base of the unit and add lock washers. Use the 1/2″ ratcheting wrench to secure the motor.
C. Slide clamp with screws over pump and mate pump shaft to motor. Use phillips screwdriver to tighten clamp.
D. Ensure the pump intake and discharge tubing are secure in the push-to-connect fittings.
E. Run a Manual Mist to confirm the unit is working.
5. Replace shroud, controller and sidewalls.