No products in the cart

iMist3 Setup: Part 1 – Connecting and Associating the Module
Download the full iMist3 Setup Guide for printing.
* iMist3 is designed to be installed directly on a MistAway System and connect to a cellular tower. It does not connect to a home’s internet network.
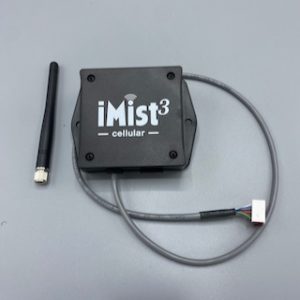
Pictured: iMist3 Module, iMist3 Antenna
Note: If you are replacing an iMist1 with an iMist3, please follow these instructions about disconnecting and removing iMist1.
Connections
- Unplug the misting unit from power and remove its controller.
- Daisy Chain connect the iMist3 module, white receiver, and controller as shown.
- Please note how the white connectors are plugged in as their orientation is extremely important. (Click on image below to enlarge)
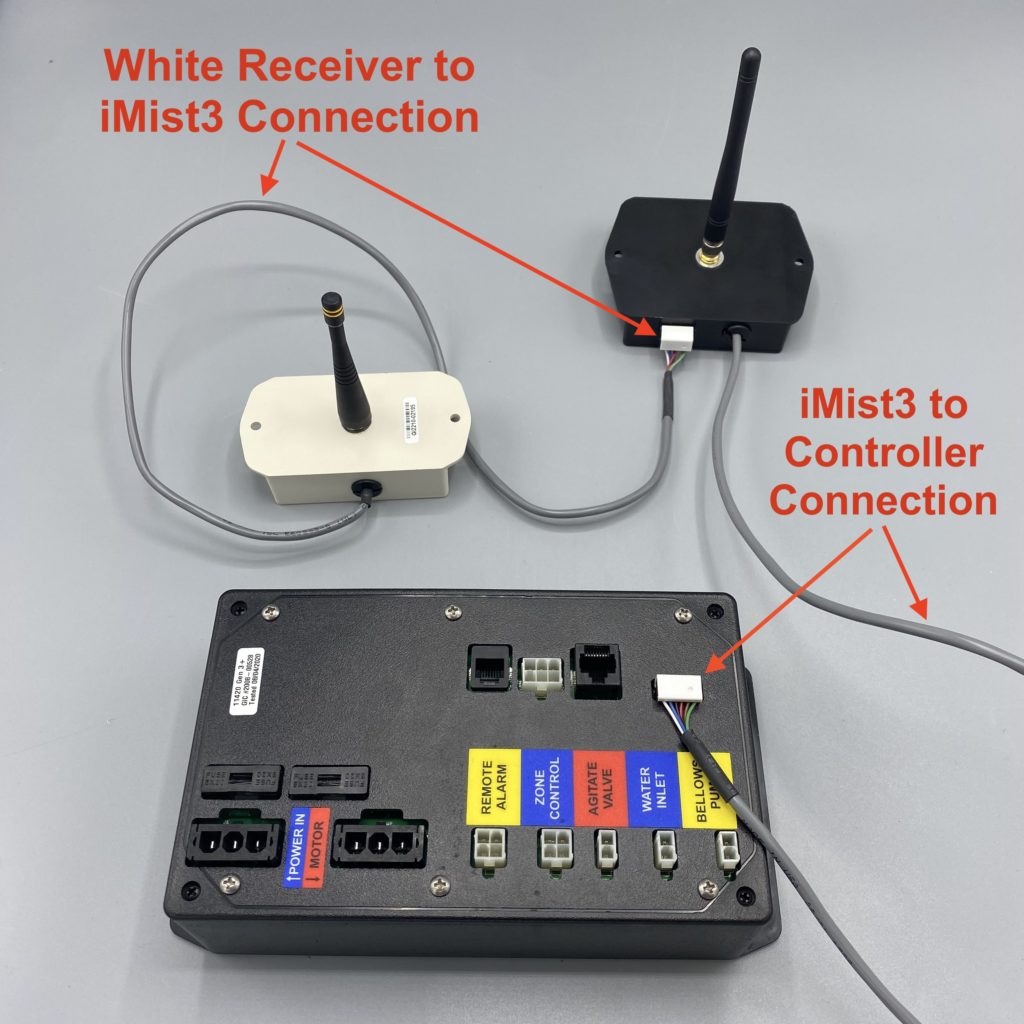
- Note: If you are replacing an iMist1 with iMist3, you should have removed and discarded the iMist1 module and there is no daisy-chain with the black remote receiver. It should remain connected to the controller with a length of network cable.
- Thread antenna onto coax connector on module by finger tightening.
- Power on controller and module.
- Observe controller boot up screen and confirm “IM1 ON” appears on controller.
Understanding How the Module Connects to Mobile Networks
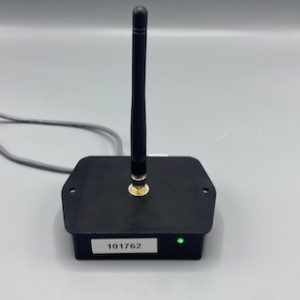
Once the misting unit and iMist3 module have power, the green LED on the module will begin flashing. This LED has 2 different modes that correlate with a state of connection:
- Fast flashing = Searching
- The iMist3 module is searching for a suitable mobile tower to connect to.
- Slow flashing = Latched
- The iMist3 module has latched to a mobile network.
- In general, this process takes between 1-5 minutes.
Add Customer from App
- Login to the iMistAway App.
- Tap Menu (≡) icon in upper left, then select “Customers”.
- Tap “+ Add” in upper right to add a new customer.
- Input Customer Information and then tap “Save”.
Associate iMist3 Module with Customer
- Tap Menu (≡) icon in upper left, then select “Gateways”.
- Tap on “+ Add” button in upper right, then select “Add Gateway” in next screen.
- Enter Customer last name and select from list.
- Scan QR Code or type in 6-digit ID from iMist3 module label and select.
- Green “Gateway Added” screen confirms module has been associated to customer.
- Tap “Gateway Manager” button.
Check Connection and Test Unit
- Tap Menu (≡) icon in upper left and select “Misting Units”.
- Find for the newly connected unit by searching for the customer’s name.
- Check Connection status of unit and run a test mist.
Send Invitation Email to Customer
- Tap Menu (≡) icon in upper left, then select “Customers”.
- Search for customer and open their account information by tapping on their name.
- Tap on “Email” to send login invitation.
You can now proceed with module installation: iMist3 Setup: Part 2 – Installing the Module